| |
image by George Hagerman,
hagerman@vt.edu |
| |
image by George Hagerman,
hagerman@vt.edu |
The following is a sample program which demonstrates the current features of dgiGL:
cube_rotate.CIn order to use dgiGL to manage OpenGL rendering, a dgiGL object must be
created. This happens at the beginning of the main function above. Then,
the programmer can set up the initialization and display callbacks. To do
this, the programmer must use the ::display() method of the
dgiGL object to get the dgiGLDisplay object. Then the callbacks can be set
using the ::setInitFunc and ::setDisplayFunc member
functions of the dgiGLDisplay object
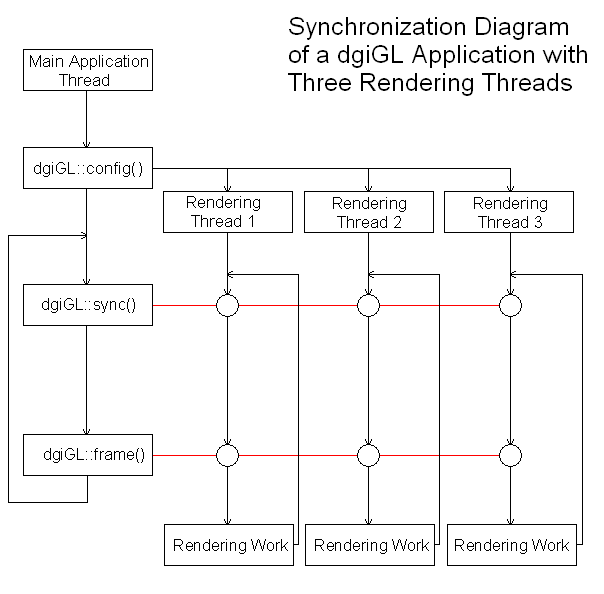
Now that the callback functions are set, the dgiGL object can be used to
manipulate the drawing processes. First, the ::config() method
of the dgiGL object is called. This spawns one rendering thread per display
pipeline. Once the rendering threads begin, two method calls are used as
synchronization points. First, ::frame signals the rendering
threads to begin calling the display callback, then immediately returns. The
::sync() method blocks until all rendering threads are ready to
begin drawing a new frame. During each frame, the display callback function
is called once per defined viewport. The display pipelines, windows and viewports are defined by the display DSOs
Input is not a part of this project at the current time. In the future,
the augment loader will be used to utilize the input system developed for
dgiPf during the fall of 2000. For now, you can set the "head" position
by calling dgiGLDisplay::updateFrusta.
One rendering thread is created for each graphics pipeline on the computer that is running a dgiGL program. Each rendering thread may control many display windows, and each window may contain many viewports. A typical desktop application may only have one pipe and one window, but an application that runs in a projection based system such as the CAVE(tm) may have many windows for displaying images on each of its 4-6 walls. In order to get the same program to run on as many systems as possible without creating extra work for the application programmer, the pipes, windows, and viewports are all defined externally in a display DSO which is dynamically loaded at run time.
For each viewport in each window on each pipe, the display callback is called once per frame. And because on multipipe systems, multiple threads of execution may be drawing at the same time, the display function must be threadsafe. If the function cannot be made threadsafe, it can protect its critical sections with a POSIX Threads mutex, which will cause a decrease in performance on multipipe systems.
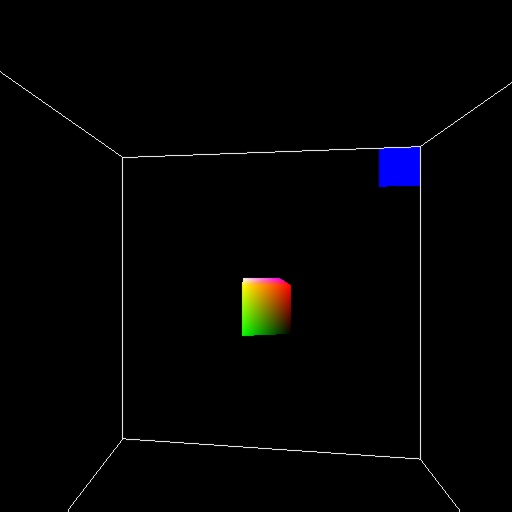
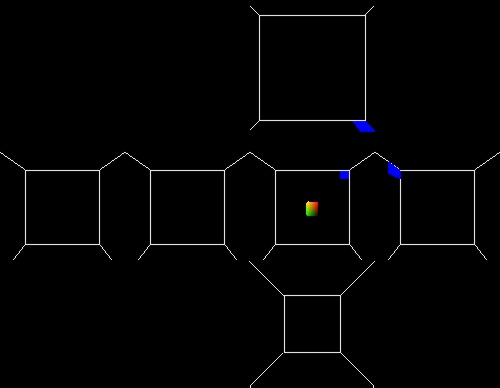
The following two images show what the sample program would look like when running with two different display DSOs. One display DSO defines a single desktop window, while the other sets up six viewports, one each to the front, back, left, right, top, and bottom of the user's head.
Figure 2.2: cube_rotate.C Output Using the simpleDesktop.so Display DSO