ESM4714
Scientific Visual Data Analysis and Multimedia
Exercise #2: PV-Wave Introduction
Objectives:
Understand how to use basic PV-Wave commands and data formats to generate images. Procedure: NOTE: Highlighted italic text denotes user response.
Create images and a animation sequence from a 3-Dimensional(3D) data set,
brown.ascii (Gas-Air Mixture simulation), using TV-grayscale, contours, raised
3D-surfaces, and gouraud shaded 3D-surfaces.
Logon to mecury -> pluto.smvc.vt.edu in the the SMVC classroom.
Mount your optical disk
(see procedure
for mounting scsi devices).
If you are on a workstaions mercury->pluto in the SMVC you should be able to
find the file ESM4714.tar.gz one directory below your home directory (cd ../homework)
and copy this file into your home directory and/or onto your optical disk. If you lose or
destroy any files you can go back to get the original ESM4714.tar.gz. When you
are done with this exercise you can remove the directory and all its contents
recursively by using a single UNIX command % \rm -rf "your new directory
name". Be careful when you use this command: the system does
not query you before the files and directories are actually deleted.
If your optical disk was just formatted you must first get a copy of ESM4714.tar.gz:
With your optical disk mounted at /rmdisk/rmdisk0:
cd ~username (This will place you at your home directory)
cd ../homework (The ESM4714.tar.gz file is archived in this directory)
ls -la (In this list of files and directories you should see ESM4714.tar.gz)
NOTE: the rwx permissions assigned to ESM4714.tar.gz should give you read privilages which
means you should be able to copy ESM4714.tar.gz to your optical disk or your home directory
cp ESM4714.tar.gz /rmdisk/rmdisk0 (copy file to your optical disk) OR
cp ESM4714.tar.gz ~username (copy file to your home directory)
cd /rmdisk/rmdisk0 (go to optical disk directory where you just copied ESM4714.tar.gz)
ls -la (verify that the file ESM4714.tar.gz was indeed copied correctly)
gunzip ESM4714.tar.gz (uncompress the file)
ls -la (verify that the file was uncompress by noticing that the *.gz extension is gone)
tar xvf ESM4714.tar (untar the file into it's directories and files)
ls -la (verify that a new directory ESM4714 was created)
Now you are ready to work with ESM4714 data files either on your optical disk or in your home directory.
Initiate PV-Wave:
% wave
and the system returns the prompt
wave>
Load the file brown.ascii.start and assign it to unit 1.
wave> openr,1,'brown.ascii.start'
Create an integer array "a" for storing data:
wave> a=intarr(64,64)
Read data from unit 1 and place data into array "a".
wave> readf,1,a
Create a window (number 1) with 64 pixels along the x-horizontal and 64
pixels along the vertical (xsize=64, ysize=64) and position the lower left corner
of this window 200 pixels left of the CRT screen and 600 pixels up from the
bottom of the CRT.
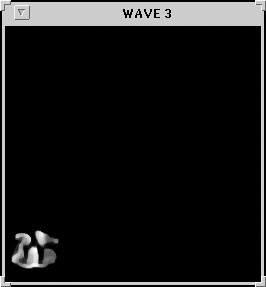
wave> tv,a compare it with this image where no scaling is done
NOTE: There is a difference in the two images because brown.ascii.start is already a scaled 3D interger field with a minimum of 0 and a maximum of 255 but these values may not always exist in each 2D layer (slice) of the 3D data. This is verified below.
Find the maximum and minimum values and print them.
wave> maxa=max(a)
wave> mina=min(a)
wave> print,mina,maxa
Read the next field (slice)(64,64) of the 3D data set and satisfy yourself
that the minimum and maximum values can vary in adjacent slices and are not
necessarily 0 or 255.
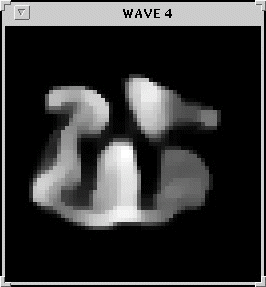
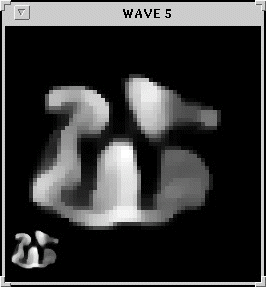
Create a larger window but scaled by an integer multiple of 4.
NOTE: The original data appers as a small scaled tv-grayscale image in the
lower left corner. This should tell you where PV-Wave locates the image origin
at the lower left corner which is different when viewing the same data in
SpyGlass where the image is in the upper left corner.
Scale image to full size of the window and draw the newly scaled image.
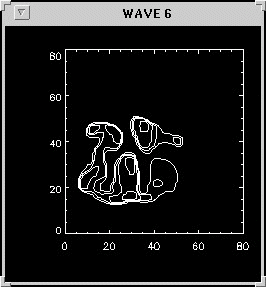
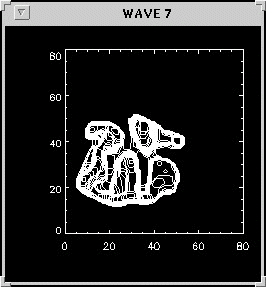
With the larger window draw arrays "a" and "aa" with contour lines for comparison.
wave> contour,a compare this image with one that has more contour lines
wave> contour,aa
If you want more contour lines you can over-ride the default with the nlevels parameter.
wave> contour,a,nlevels=25 this image has more contour lines.
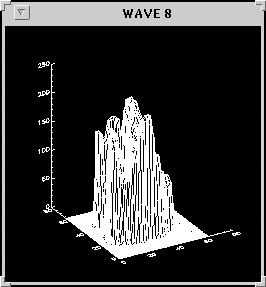
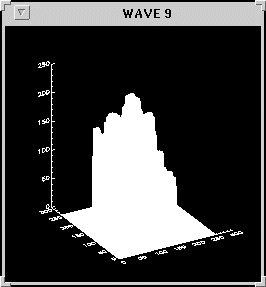
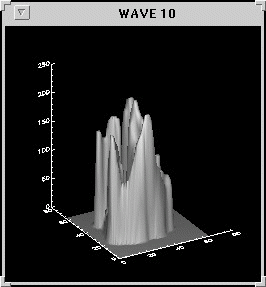
Within the same window (window#2) familiarize yourself with the features of
other visualization routines that either operate on "a" or "aa" arrays. For
example.
wave> shade_surf,aa and compare it with this image
Recommendation: You may now try other PV-Wave routines such as "smooth" or
you could tilt the shade_surf image by rotating about the horizontal, ax=30
(default), and/or rotation about the vertical axis, az=30 (default). A different
tilt angle view can reveal new information.
If you want to store your image as a binary "byte" array first open a
filename in which the image will be stored, then create the byte array name with
dimensions the same as the window size, and then finally transfer the image to
this "bytarr" array.
wave> openw,2,'image.byt'
wave> image=assoc(2,bytarr(256,26))
wave> image(1)=tvrd(0,0,256,256)
NOTE: Here we stored only one image. We could also create a sequence of
images, "animation", one image for each slice, and store all these images in one
large file. This can be done by writing a procedure file of PV-Wave commands
with a "for" loop command.
Create and store Shade_surf images for all 44 slices from brown.ascii and store these images in file named "images.byt" and play back this image sequence as an animation by using PV-Wave procedure files which are listed below. Using the "vi" editor, create these two procedure files listed below.
Procedure filename "create_images.pro" : % vi create_images.pro